Piscataway Roofing handles roof repair in Piscataway, NJ, serving surrounding cities including Middlesex, Highland Park, Bound Brook, Metuchen and Manville. With more than 20 years of roofing work behind us, we repair shingle roofs, flashing, vents and low-slope membranes on houses, townhouses, small apartment buildings and commercial properties. The goal of every visit is the same: stop the water, fix the cause and make the repair last.
A repair is only as good as the diagnosis under it. Water that drips through a bedroom ceiling may have entered three feet uphill, at a chimney, a pipe boot or a lifted shingle, so we look at the attic side of the decking before climbing onto the roof. Pricing comes after the entry point is found, never before.
You also get an honest read on whether the roof is worth repairing at all. Many roofs need nothing more than a few shingles or a new boot, and we would rather fix those than sell a replacement nobody needs. When a roof is truly worn out, we show you the photos that prove it.
Residential Roof Repair
Shingle Repairs After Wind and Age
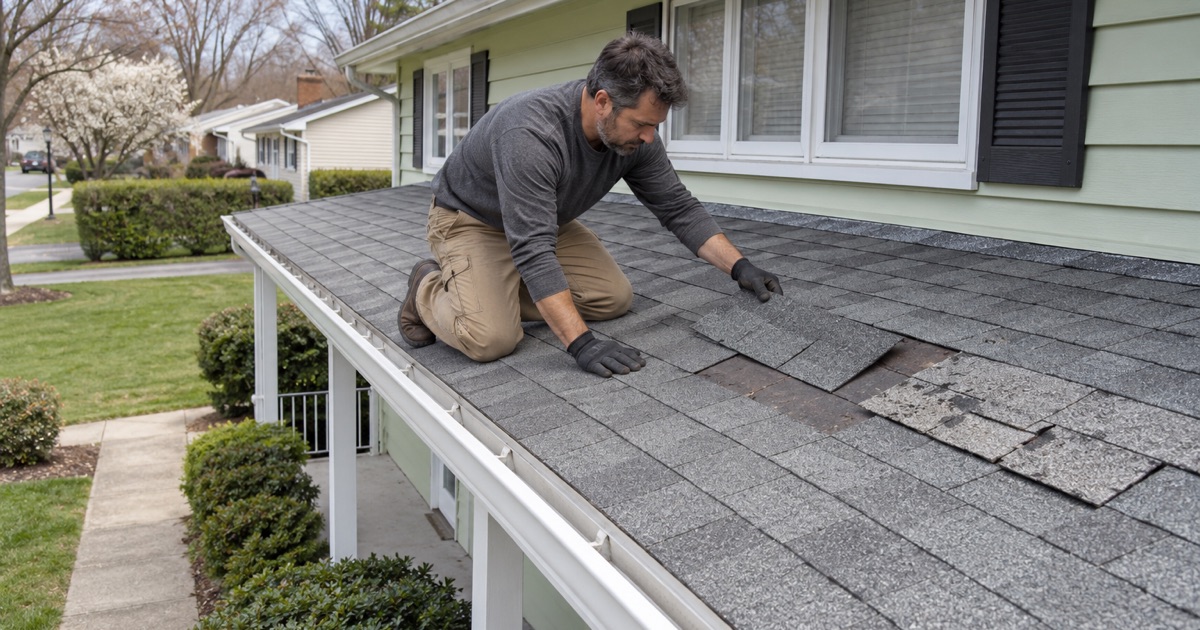
Asphalt shingles fail in two ways: wind breaks the seal strip and lifts tabs, or age dries them out until they crack and shed granules. Wind damage on an otherwise healthy roof is a straightforward repair, where we slide new shingles under the course above, nail them on the correct line and hand-seal any neighbors that lifted.
Age damage is different, because brittle shingles around a repair can crack as we work them loose. We test a few tabs before quoting, and if the field shingles are too dry to handle, we say so up front rather than leave you with a patch that breaks the roof around it.
Flashing Repairs at Chimneys and Walls
Where a roof meets a chimney, a dormer wall or a second-story sidewall, water is kept out by layers of metal rather than shingles. Step flashing weaves into each shingle course, counter flashing covers it from above, and kick-out flashing at the bottom of a wall steers water into the gutter instead of behind the siding.
When any of those pieces is missing, rusted or simply caulked over, the leak usually shows up inside the wall or on a ceiling below the chimney. We replace the failed metal rather than adding sealant over it, because caulk on flashing is a delay, not a repair.
Pipe Boots, Vents and Exhaust Caps
Rubber pipe boots around plumbing vents crack after years of sun, and they are among the most common leak sources on any roof. We replace them with new boots, or with lead flashing boots where the pipe and roof suit them, and check the seal on bathroom fan caps and roof vents at the same time.
These are small, inexpensive repairs that stop a surprising share of the leaks we are called for. They are also easy to miss from the ground, which is why a full look at the roof comes with every leak visit.
Commercial and Flat Roof Repair
EPDM and TPO Membrane Repairs
Low-slope roofs on additions, garages, apartment buildings and commercial properties are covered with membranes rather than shingles. EPDM rubber is repaired with cleaned, primed patches and seam tape, while TPO and PVC single-ply roofs are repaired by heat-welding new membrane to the old.
Punctures from foot traffic, open seams and shrinkage at the edges are the usual failures. We find them by inspecting every seam and flashing detail rather than only the spot above the stain, because a flat roof that leaks in one place often has two or three weak seams waiting.
Torch-Down Modified Bitumen Repairs
Torch-down roofing in SBS or APP modified bitumen is built up in heat-welded layers and is common on porch roofs, older commercial buildings and low-slope sections of homes. Blisters, split seams and cracked flashing at walls are repaired by cutting out the damaged area and welding in new layers that overlap sound material.
On older roofs we also check the condition of the insulation underneath, since wet insulation under a patched membrane keeps feeding moisture into the deck even after the leak is stopped.
Drains, Scuppers and Parapet Walls
Water that cannot leave a flat roof finds its way in. We clear and reflash drains and scuppers, repair parapet wall caps and counter flashing, and look for low spots where ponding water sits for days after a storm.
Piscataway’s commercial stock includes large modern distribution buildings as well as older strip and office buildings, and their drainage details differ. Each gets a repair matched to its system rather than a generic patch.
Roof Repairs Common on Older Piscataway Homes
Roofs Already Carrying Two Layers
Nearly half of the township’s homes were built between 1950 and 1979, so many have already been re-roofed once, sometimes right over the original layer. Repairs on a two-layer roof take more care, because nails must reach through both layers into the deck and the extra thickness hides soft wood.
We note the layer count on every repair visit. That number matters later, since New Jersey does not allow a new roof over two or more existing layers, and knowing it in advance avoids a surprise on the day of a future replacement.
Low-Slope Porch and Addition Roofs
Split-levels and colonials from the 1960s and 1970s often have a nearly flat roof over a porch, carport or rear addition. Shingles on a slope that low leak no matter how well they are nailed, which is why these sections show up again and again in our repair calls.
Where a shingle patch will only buy a season, we explain the option of converting the section to a membrane or standing seam metal so the problem stops coming back.
Lead-Safe Work on Painted Trim
Homes built before 1978 may have lead paint on fascia, soffits and trim boards that a roof repair disturbs. The EPA’s Renovation, Repair and Painting rule sets lead-safe work practices for that kind of work, including containment and cleanup.
We plan repairs that touch painted trim on older homes with those practices in mind, so a fascia replacement does not leave paint chips in the yard where children play.
Our Step-by-Step Roof Repair Process
Step 1: Inside Before Outside
We start in the attic or the top-floor ceiling, mapping wet wood, stains and daylight. That map tells us where to look on the roof surface and keeps the repair from being aimed at the wrong spot.
Step 2: Find and Photograph the Source
On the roof we confirm the entry point and photograph it, along with anything else that needs attention soon. You see what we see before anything is priced.
Step 3: Written Repair Price
You get a written price covering materials and labor separately, with a plain statement of whether repair is the right call or replacement is closer than it looks. The separate lines also keep the sales tax on a repair figured correctly.
Step 4: Repair, Clean Up and Report
The repair is made with matching materials, debris is cleaned up the same day, and you receive photos of the finished work. If a ceiling was stained, it can then be repaired knowing it will stay dry.
- 20+ Years Roofing
- Itemized Written Estimates
- Attic-to-Ridge Leak Tracing